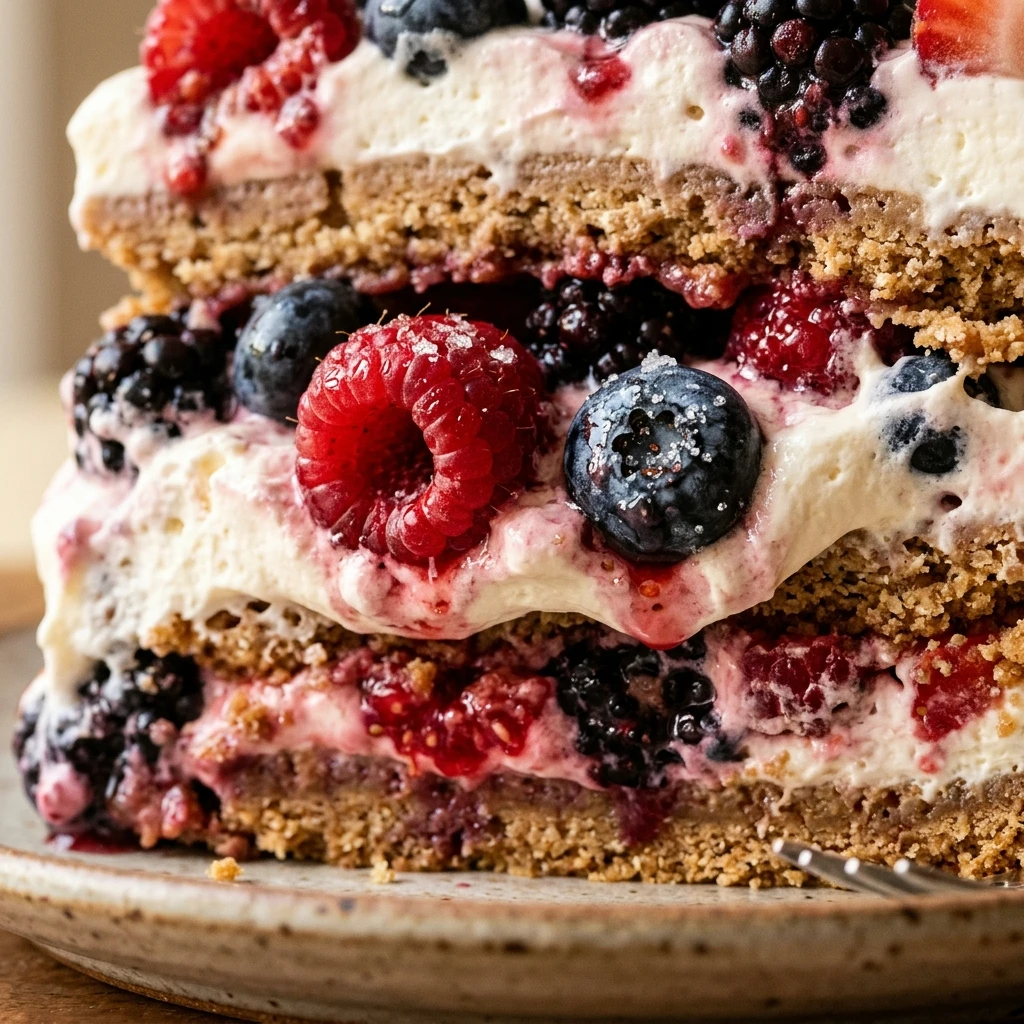
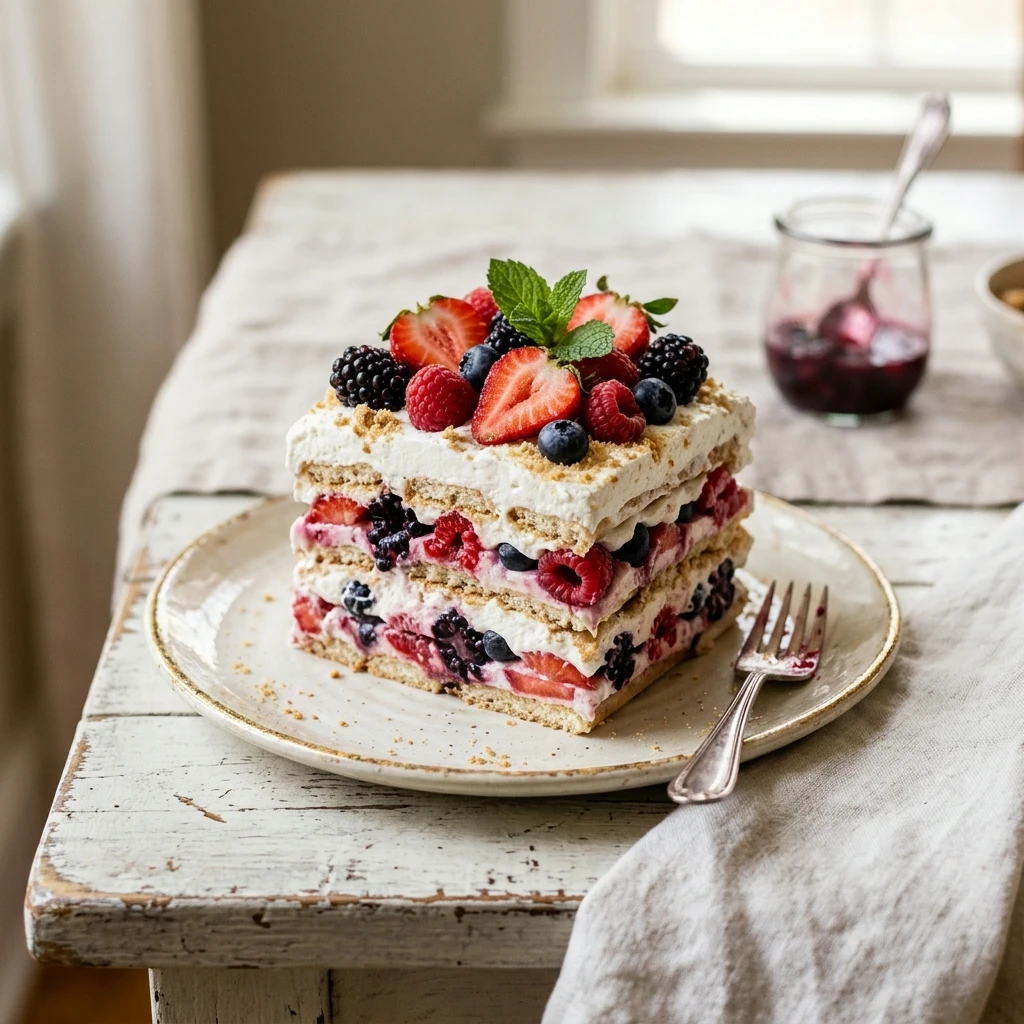
When the temperature rises and the humidity kicks in, the last thing anyone wants to do is preheat an oven. This Berry Icebox Cake with Whipped Cream Layers is the ultimate summer survival tool. It is light, refreshing, and shockingly simple to assemble. By layering crisp graham crackers with pillows of homemade whipped cream and a mountain of fresh berries, you create a dessert that magically transforms in the refrigerator. The crackers soften into a cake-like texture, absorbing the moisture from the cream, while the berries add a bright, tart burst of flavor. Whether you are hosting a backyard barbecue or just need a sweet treat to keep in the fridge, this no-bake masterpiece is guaranteed to disappear in minutes.
Recipe Information
- Prep Time: 25 minutes
- Cook Time: 0 minutes
- Total Time: 25 minutes (plus 4-8 hours chilling time)
- Servings: 12 servings
- Difficulty: Easy
Nutrition values
- Calories: 295 kcal
- Protein: 3g
- Carbs: 34g
Why Make This Berry Icebox Cake with Whipped Cream Layers
This recipe is a game-changer for busy hosts and dessert lovers alike. First, it requires absolutely no baking, which keeps your kitchen cool. Second, the ingredients are humble and easy to find, yet they come together to look incredibly elegant once sliced. The texture is the real star here; the graham crackers undergo a chemistry-like change, turning into soft, tender layers that mimic the finest sponge cake. It is also a fantastic “make-ahead” dish. In fact, it actually tastes better the longer it sits, allowing you to focus on your guests rather than last-minute kitchen stress. Finally, it uses fresh, seasonal fruit, making it a vibrant and relatively light way to end a heavy meal.
Ingredients
- 3 cups heavy whipping cream, very cold
- 1/2 cup powdered sugar
- 2 teaspoons pure vanilla extract
- 1 box (approx. 14.4 oz) honey graham crackers
- 1 lb fresh strawberries, hulled and thinly sliced
- 1 pint fresh blueberries
- 1 pint fresh raspberries
- Optional: Fresh mint leaves for garnish
Directions
Step 1: Prepare the Fresh Berries
Wash all the berries thoroughly and pat them dry with a paper towel. Slice the strawberries into thin, even rounds. Keep the blueberries and raspberries whole. Set the fruit aside in separate bowls so they are easy to grab during the assembly process.
Step 2: Whip the Cream
In a large chilled glass or metal bowl, combine the cold heavy whipping cream, powdered sugar, and vanilla extract. Use a hand mixer or a stand mixer fitted with the whisk attachment to beat the mixture on medium-high speed. Continue whisking until stiff peaks form. Be careful not to over-beat, or the cream will become grainy and turn into butter.
Step 3: Create the First Layer
Spread a very thin layer of the whipped cream on the bottom of a 9×13-inch baking dish. This acts as “glue” to keep the crackers in place. Arrange a single layer of graham crackers over the cream, breaking them into smaller pieces if necessary to fit the corners and edges of the pan.
Step 4: Build the Internal Layers
Spread about 1/3 of the remaining whipped cream evenly over the graham crackers. Scatter 1/3 of the sliced strawberries, blueberries, and raspberries over the cream layer. Place another layer of graham crackers on top of the fruit, pressing down gently to settle them. Repeat this process twice more, ending with a final layer of whipped cream on top.
Step 5: Decorate the Top
Once you have spread the final layer of whipped cream smoothly over the top, arrange the remaining berries in an attractive pattern. You can create rows of different colors or a rustic, scattered look. Garnish with mint leaves if you want an extra pop of green color.
Step 6: Chill and Set
Cover the dish tightly with plastic wrap or a lid. Place the cake in the refrigerator for at least 4 hours, though 8 hours or overnight is best. This time is crucial because it allows the crackers to soften and the flavors to meld. Slice into squares and serve cold.
Expert Tips for Perfect Berry Icebox Cake with Whipped Cream Layers
Start with very cold cream and a chilled bowl to ensure your whipped cream reaches maximum volume and stability. If your kitchen is hot, pop your mixing bowl in the freezer for ten minutes before starting. When layering, try to cover as much of the cream with crackers as possible to create a sturdy structure. Use the ripest berries you can find, as their juices will help soften the crackers and provide natural sweetness. If you want perfectly clean slices, wipe your knife with a warm, damp cloth between every single cut.
Delicious Variations
You can easily customize this cake to suit your taste. Try using chocolate graham crackers or ginger snaps instead of honey grahams for a deeper flavor profile. For a citrus twist, fold a tablespoon of lemon or lime zest into the whipped cream before assembling. If you want a richer filling, beat 8 ounces of softened cream cheese into the whipped cream for a “cheesecake” style icebox cake. You can also swap the berries for sliced peaches, mangoes, or kiwi for a tropical version of this classic dessert.
Frequently Asked Questions
Can I use frozen berries instead of fresh?
It is best to use fresh berries for this recipe. Frozen berries release a lot of liquid as they thaw, which can make the whipped cream runny and the graham crackers soggy rather than tender. If you must use frozen, thaw and drain them completely, but the texture will not be as crisp.
How long does this cake last in the fridge?
The cake is best eaten within 24 to 48 hours. After two days, the graham crackers can become overly soft, and the berries may begin to weep juice, affecting the appearance and texture of the cream.
Can I make this recipe dairy-free?
Yes, you can substitute the heavy cream with a high-quality canned coconut cream or a plant-based heavy whipping cream alternative. Ensure the alternative you choose is capable of being whipped into stiff peaks.
What is the best way to slice an icebox cake?
For the cleanest slices, ensure the cake has chilled for at least 6 hours. Use a sharp, thin-bladed knife. Dip the knife in hot water and wipe it dry before each slice to prevent the cream from sticking and tearing the layers.
Can I use store-bought whipped topping like Cool Whip?
While you can use store-bought whipped topping to save time, the flavor and texture of homemade whipped cream are significantly better. If you use store-bought topping, you may want to reduce the added sugar in the recipe as those products are already quite sweet.
Conclusion
The Berry Icebox Cake with Whipped Cream Layers is the ultimate proof that you do not need a hot oven to create a spectacular dessert. With just a few simple ingredients and a little bit of patience while it chills, you can serve a treat that is light, creamy, and bursting with fresh fruit flavor. It is the perfect centerpiece for any summer gathering, offering a refreshing bite that everyone will love. Give this recipe a try the next time you need a crowd-pleasing dessert that takes minimal effort but delivers maximum impact!


Berry Icebox Cake with Whipped Cream Layers
- Total Time: 25 minutes
- Diet: Vegetarian
Ingredients
- 3 cups heavy whipping cream, very cold
- 1/2 cup powdered sugar
- 2 teaspoons pure vanilla extract
- 1 box (approx. 14.4 oz) honey graham crackers
- 1 lb fresh strawberries, hulled and thinly sliced
- 1 pint fresh blueberries
- 1 pint fresh raspberries
- Optional: Fresh mint leaves for garnish
Instructions
- Step 1: Prepare the Fresh Berries: Wash all the berries thoroughly and pat them dry with a paper towel. Slice the strawberries into thin, even rounds. Keep the blueberries and raspberries whole. Set the fruit aside in separate bowls so they are easy to grab during the assembly process.
- Step 2: Whip the Cream: In a large chilled glass or metal bowl, combine the cold heavy whipping cream, powdered sugar, and vanilla extract. Use a hand mixer or a stand mixer fitted with the whisk attachment to beat the mixture on medium-high speed. Continue whisking until stiff peaks form. Be careful not to over-beat, or the cream will become grainy and turn into butter.
- Step 3: Create the First Layer: Spread a very thin layer of the whipped cream on the bottom of a 9×13-inch baking dish. This acts as “glue” to keep the crackers in place. Arrange a single layer of graham crackers over the cream, breaking them into smaller pieces if necessary to fit the corners and edges of the pan.
- Step 4: Build the Internal Layers: Spread about 1/3 of the remaining whipped cream evenly over the graham crackers. Scatter 1/3 of the sliced strawberries, blueberries, and raspberries over the cream layer. Place another layer of graham crackers on top of the fruit, pressing down gently to settle them. Repeat this process twice more, ending with a final layer of whipped cream on top.
- Step 5: Decorate the Top: Once you have spread the final layer of whipped cream smoothly over the top, arrange the remaining berries in an attractive pattern. You can create rows of different colors or a rustic, scattered look. Garnish with mint leaves if you want an extra pop of green color.
- Step 6: Chill and Set: Cover the dish tightly with plastic wrap or a lid. Place the cake in the refrigerator for at least 4 hours, though 8 hours or overnight is best. This time is crucial because it allows the crackers to soften and the flavors to meld. Slice into squares and serve cold.
- Cook Time: 25 minutes (plus 4-8 hours chilling time)