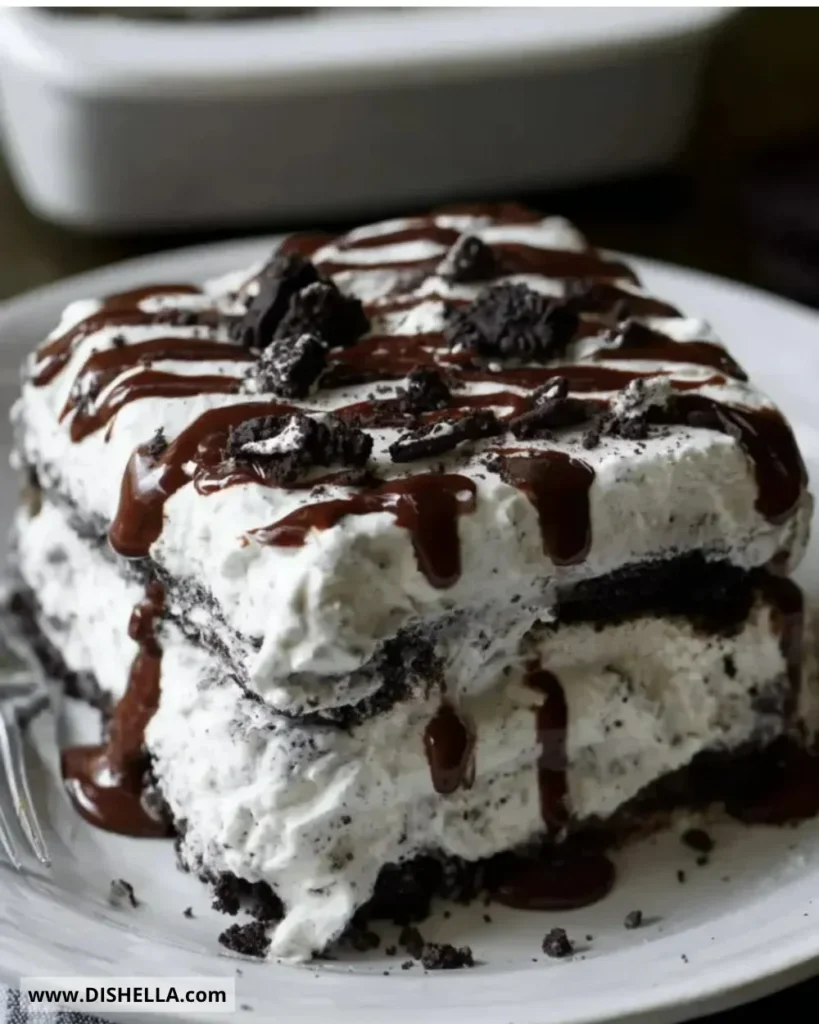
Oreo Icebox Cake is a delightful dessert that requires no baking and is perfect for any occasion. With its luscious layers of cream and crunchy Oreo cookies, this cake is sure to please both kids and adults. It’s especially refreshing on warm days, making it a go-to recipe for summer gatherings or a simple family treat.
Recipe Information
- Prep Time: 20 minutes
- Cook Time: 0 minutes
- Total Time: 4 hours 20 minutes
- Servings: 8
- Difficulty Level: Easy
Nutrition Information
- Calories per serving: 350
- Protein: 4g
- Carbohydrates: 35g
- Fat: 22g
- Fiber: 1g
- Sugar: 22g
- Sodium: 150mg
Why Make This Oreo Icebox Cake
Making Oreo Icebox Cake is a breeze, and it comes with a deliciously creamy and sweet flavor that everyone loves. This dessert is not only simple to prepare but also incredibly satisfying. Layering the crunchy Oreos with the velvety cream creates a delightful texture surprise in each bite. Plus, the best part is that it requires minimal effort and time, making it perfect for busy weeknights or spontaneous gatherings.
How to Make Oreo Icebox Cake
Creating this Oreo Icebox Cake is as fun as it is easy! Just follow the steps below to indulge in this creamy treat.
Ingredients:
- 1 package Oreo cookies
- 1 package (8 oz) cream cheese, softened
- 1 cup powdered sugar
- 2 cups whipped cream or Cool Whip
- 1 tsp vanilla extract
- 1 cup milk
Directions:
-
Step 1: Preparation
In a mixing bowl, beat the cream cheese and powdered sugar until smooth. This will create a creamy base for your layers.
-
Step 2: Mixing
Fold in the whipped cream and vanilla extract until well combined. This step adds lightness and airiness to your mixture, enhancing the dessert’s texture.
-
Step 3: Layering Cookies
Dip Oreo cookies in milk quickly, then layer them in the bottom of a dish. Make sure not to soak them too long; you want them slightly softened but still holding their shape.
-
Step 4: Spreading Cream
Spread a layer of the cream cheese mixture over the cookies. Use a spatula to smooth it out evenly.
-
Step 5: Repeat Layers
Repeat layering with the remaining cookies and cream mixture until you run out of ingredients, finishing with a final layer of cream.
-
Step 6: Finishing Touch
Finish with a generous topping of whipped cream on top. This adds an extra creamy layer that shines when served.
-
Step 7: Refrigeration
Refrigerate for at least 4 hours or overnight. This resting time allows the flavors to meld and the cake to set nicely.
-
Step 8: Serving
Serve chilled to enjoy the full effect of the cold, creamy layers.
How to Serve Oreo Icebox Cake
Oreo Icebox Cake can be served simply on its own, or you can dress it up with some chocolate shavings or mini Oreo cookies on top for garnish. It makes a lovely addition to any dessert table and is perfect for holidays, birthdays, or just a special weekday treat.
How to Store Oreo Icebox Cake
Store leftover Oreo Icebox Cake in an airtight container in the refrigerator. It’s best enjoyed within 3 to 5 days for optimal freshness. As it sits, the flavors continue to develop, making it even tastier over time!
Expert Tips for Perfect Oreo Icebox Cake
- For easier layering, use a rectangular dish to create a visually appealing cake.
- Feel free to substitute the whipped cream with a homemade version for a fresher taste.
- Switch up flavors by mixing in crushed Oreos or chocolate pudding between the layers for added richness.
Delicious Variations
- Mint Oreo Icebox Cake: Use Mint Oreos for a refreshing twist.
- Peanut Butter Oreo Icebox Cake: Add peanut butter to the cream mixture for a nutty flavor.
- Fruit Layer: Incorporate fresh berries or bananas between the layers for a fruity addition.
Frequently Asked Questions
- Can I use low-fat cream cheese? Yes, you can use low-fat cream cheese for a lighter version of this dessert, though it may alter the taste slightly.
- Can I make this cake ahead of time? Absolutely! This cake is perfect for making a day or two in advance as it allows the flavors to meld beautifully.
- Can I freeze Oreo Icebox Cake? Yes, you can freeze it for up to 2 months. Just wrap it tightly in plastic wrap and foil. Thaw it overnight in the refrigerator before serving.
- What is the best way to cut the cake? Use a sharp knife and dip it in hot water before cutting to achieve clean slices.
- Can I substitute Cool Whip for real whipped cream? Yes, Cool Whip works well and is a time-saver. However, homemade whipped cream provides a fresher taste and texture.
Conclusion
Oreo Icebox Cake is an easy-to-make dessert that is perfect for any occasion. With its creamy layers and delightful crunch, it’s a treat that often disappears faster than you can serve it! Whether you’re hosting a party or just craving a sweet indulgence, this refreshing cake is sure to impress. Don’t hesitate to give this recipe a try; your taste buds will thank you!
Print
Oreo Icebox Cake
- Total Time: 260
- Yield: 8 servings 1x
- Diet: Vegetarian
Description
A delightful no-bake dessert with layers of cream and crunchy Oreo cookies, perfect for warm days and special occasions.
Ingredients
- 1 package Oreo cookies
- 1 package (8 oz) cream cheese, softened
- 1 cup powdered sugar
- 2 cups whipped cream or Cool Whip
- 1 tsp vanilla extract
- 1 cup milk
Instructions
- In a mixing bowl, beat the cream cheese and powdered sugar until smooth.
- Fold in the whipped cream and vanilla extract until well combined.
- Dip Oreo cookies in milk quickly, then layer them in the bottom of a dish.
- Spread a layer of the cream cheese mixture over the cookies.
- Repeat layering with the remaining cookies and cream mixture, finishing with a final layer of cream.
- Finish with a generous topping of whipped cream on top.
- Refrigerate for at least 4 hours or overnight.
- Serve chilled.
Notes
For easier layering, use a rectangular dish. Optional to add crushed Oreos or flavored pudding for variety.
- Prep Time: 20
- Category: Dessert
- Method: No-Bake
- Cuisine: American
Nutrition
- Serving Size: 1 serving
- Calories: 350
- Sugar: 22g
- Sodium: 150mg
- Fat: 22g
- Saturated Fat: 10g
- Unsaturated Fat: 12g
- Trans Fat: 0g
- Carbohydrates: 35g
- Fiber: 1g
- Protein: 4g
- Cholesterol: 30mg