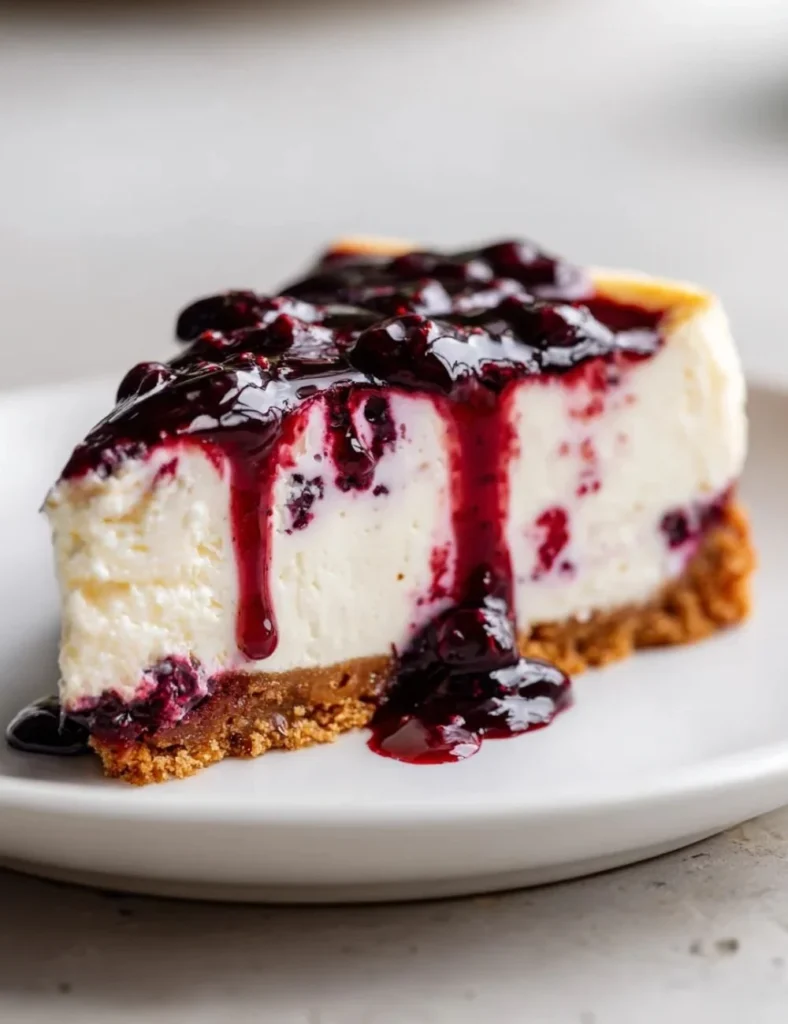
Elevate your dessert menu with this elegant Mulberry & Earl Grey Cheesecake. A creamy cheesecake base infused with fragrant Earl Grey tea is topped with a vibrant, slightly tart mulberry swirl, creating a stunning and sophisticated dessert. Perfect for special occasions, anniversaries, or dinner parties, this easy yet impressive cheesecake delivers bakery-quality flavor and presentation right at home.
Recipe Information
- Prep Time: 30 minutes
- Cook Time: 60 minutes
- Total Time: 90 minutes
- Servings: 8
- Difficulty Level: Medium
Nutrition Information
- Calories per serving: 320
- Protein: 6g
- Carbohydrates: 33g
- Fat: 20g
- Fiber: 1g
- Sugar: 16g
- Sodium: 250mg
Why Make This Mulberry & Earl Grey Cheesecake
This cheesecake not only satisfies your sweet tooth, but it also introduces a sophisticated flavor profile that is sure to impress your friends and family. The floral notes of Earl Grey complement the natural sweetness of mulberries, creating a harmonious blend that is both unique and delicious. Its light and creamy texture makes it a delightful ending to any meal. Plus, the bright colors and appealing presentation add elegance to your dessert table.
How to Make Mulberry & Earl Grey Cheesecake
Ingredients:
- 200g digestive biscuits
- 100g unsalted butter, melted
- 200ml cream
- 3 tablespoons Earl Grey tea
- 500g cream cheese
- 200ml sour cream
- 150g powdered sugar
- 2 eggs
- 1 tablespoon lemon juice
- 200g fresh or frozen mulberries
Directions:
Step 1: Preparation
Preheat the oven to 325°F (160°C). Start by preparing your crust. In a food processor, crush the 200g of digestive biscuits until they resemble fine crumbs. Mix these crumbs with 100g of melted unsalted butter until fully combined. Press the mixture evenly into the bottom of a springform pan to form the crust.
Step 2: Infusing the Cream
In a saucepan, heat 200ml of cream. Add 3 tablespoons of Earl Grey tea (you can use loose leaves or place them in a tea bag) and allow it to steep for about 10 minutes. After steeping, strain out the tea leaves, ensuring you’re left with a beautifully infused cream.
Step 3: Mixing the Filling
In a mixing bowl, beat together 500g of cream cheese, 200ml of sour cream, and 150g of powdered sugar until the mixture becomes smooth and creamy. Then, add 2 eggs one by one, mixing well after each addition. Follow with the steeped cream and 1 tablespoon of lemon juice; mix until everything is well combined.
Step 4: Incorporating Mulberries
Gently fold in 200g of fresh or frozen mulberries, taking care not to break them apart too much. Once combined, pour this luscious cheesecake filling over the prepared crust.
Step 5: Baking the Cheesecake
Bake the cheesecake in the preheated oven for about 50-60 minutes. The center should be set but still slightly jiggly—this is key for that creamy texture.
Step 6: Cooling and Chilling
After baking, turn off the oven and let the cheesecake cool with the door slightly ajar for about an hour. This gradual cooling process helps prevent cracks on the surface. After it has cooled, refrigerate it for at least 4 hours or, for the best results, overnight.
How to Serve Mulberry & Earl Grey Cheesecake
Serve your cheesecake chilled, optionally garnishing it with a sprinkle of powdered sugar or a few extra mulberries on top. For an indulgent touch, add a dollop of whipped cream or a drizzle of a rich berry sauce. This cheesecake pairs wonderfully with a cup of tea or coffee, making it a perfect dessert for an afternoon gathering or a special celebration.
How to Store Mulberry & Earl Grey Cheesecake
Store any leftovers in the refrigerator, tightly covered or in an airtight container. The cheesecake will keep well for up to 5 days. For longer storage, consider freezing it—wrap individual slices tightly in plastic wrap, then place in a freezer-safe container for up to 2 months. When ready to enjoy, thaw in the refrigerator.
Expert Tips for Perfect Mulberry & Earl Grey Cheesecake
- Room Temperature Ingredients: Using room temperature cream cheese and eggs helps create a smoother filling.
- Don’t Overbeat: When mixing in the eggs, mix just until incorporated to avoid adding too much air, which can cause cracks.
- Water Bath: If you want an extra precaution against cracks, consider baking your cheesecake in a water bath.
- Even Chilling: Make sure your cheesecake is thoroughly chilled before slicing to achieve clean cuts.
Delicious Variations
- Berry Fusion: Swap out mulberries for blueberries or raspberries for another fruity twist.
- Chocolate Drizzle: Add a chocolate ganache topping for a richer dessert.
- Lemon Zest: Incorporate lemon zest into the filling for a bright, citrusy kick.
Frequently Asked Questions
- Can I use different types of biscuits for the crust?
Yes, graham crackers or shortbread cookies make excellent substitutes for digestive biscuits. - Can I leave out the Earl Grey tea?
You can, but then it will lose that unique flavor. Consider adding a hint of vanilla or almond extract if you choose to omit the tea. - What if I can’t find mulberries?
Fresh or frozen blueberries or blackberries are great alternatives. - How do I achieve a smooth texture?
Make sure all your ingredients are at room temperature and mix until fully combined without overbeating. - Is this recipe gluten-free?
You can substitute gluten-free biscuits for the digestive biscuits to make it gluten-free.
Conclusion
Mulberry & Earl Grey Cheesecake is a dessert that combines delectable flavors and beautiful presentation. With its creamy texture and unique taste, it promises to be a showstopper at any gathering. Don’t hesitate to try your hand at this unique cheesecake; the results are bound to impress! Enjoy the delightful journey of baking and, most importantly, the joy of sharing this delicious cheesecake with your loved ones.
Print
Mulberry & Earl Grey Cheesecake
- Total Time: 90 minutes
- Yield: 8 servings 1x
- Diet: Vegetarian
Description
A delightful twist on a classic dessert, combining rich creaminess with aromatic Earl Grey tea and sweet-tart mulberries.
Ingredients
- 200g digestive biscuits
- 100g unsalted butter, melted
- 200ml cream
- 3 tablespoons Earl Grey tea
- 500g cream cheese
- 200ml sour cream
- 150g powdered sugar
- 2 eggs
- 1 tablespoon lemon juice
- 200g fresh or frozen mulberries
Instructions
- Preheat the oven to 325°F (160°C). Prepare your crust by crushing the digestive biscuits and mixing with melted butter. Press into the bottom of a springform pan.
- Heat the cream in a saucepan, add Earl Grey tea, and steep for about 10 minutes. Strain out the tea leaves.
- In a mixing bowl, beat together cream cheese, sour cream, and powdered sugar until smooth. Add eggs one at a time, mixing well after each. Stir in the steeped cream and lemon juice.
- Gently fold in mulberries. Pour the filling over the crust.
- Bake for 50-60 minutes, until the center is set but still jiggly.
- Let the cheesecake cool in the oven with the door ajar for about an hour, then refrigerate for at least 4 hours or overnight.
Notes
Store leftovers in the refrigerator for up to 5 days, or freeze individual slices for up to 2 months. For best results, use room temperature ingredients.
- Prep Time: 30 minutes
- Cook Time: 60 minutes
- Category: Dessert
- Method: Baking
- Cuisine: American
Nutrition
- Serving Size: 1 slice
- Calories: 320
- Sugar: 16g
- Sodium: 250mg
- Fat: 20g
- Saturated Fat: 12g
- Unsaturated Fat: 8g
- Trans Fat: 0g
- Carbohydrates: 33g
- Fiber: 1g
- Protein: 6g
- Cholesterol: 120mg