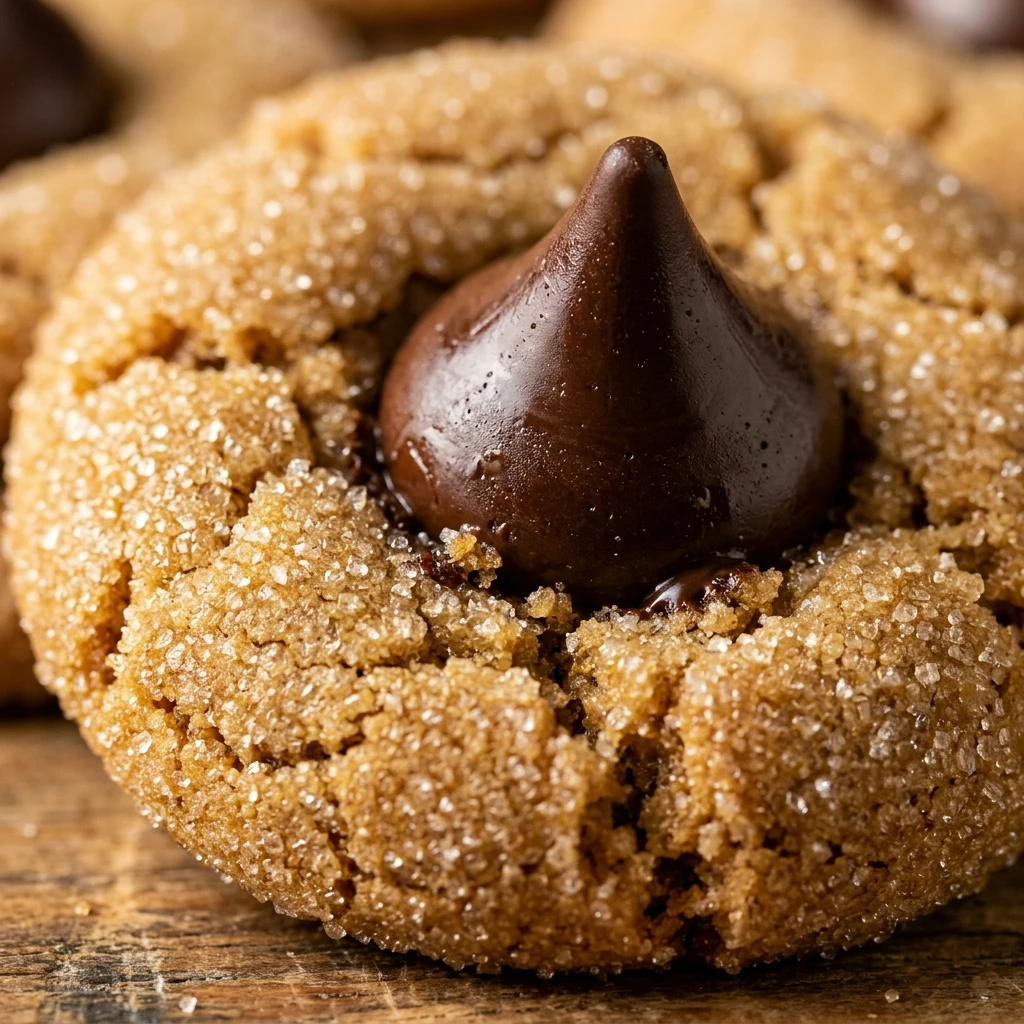
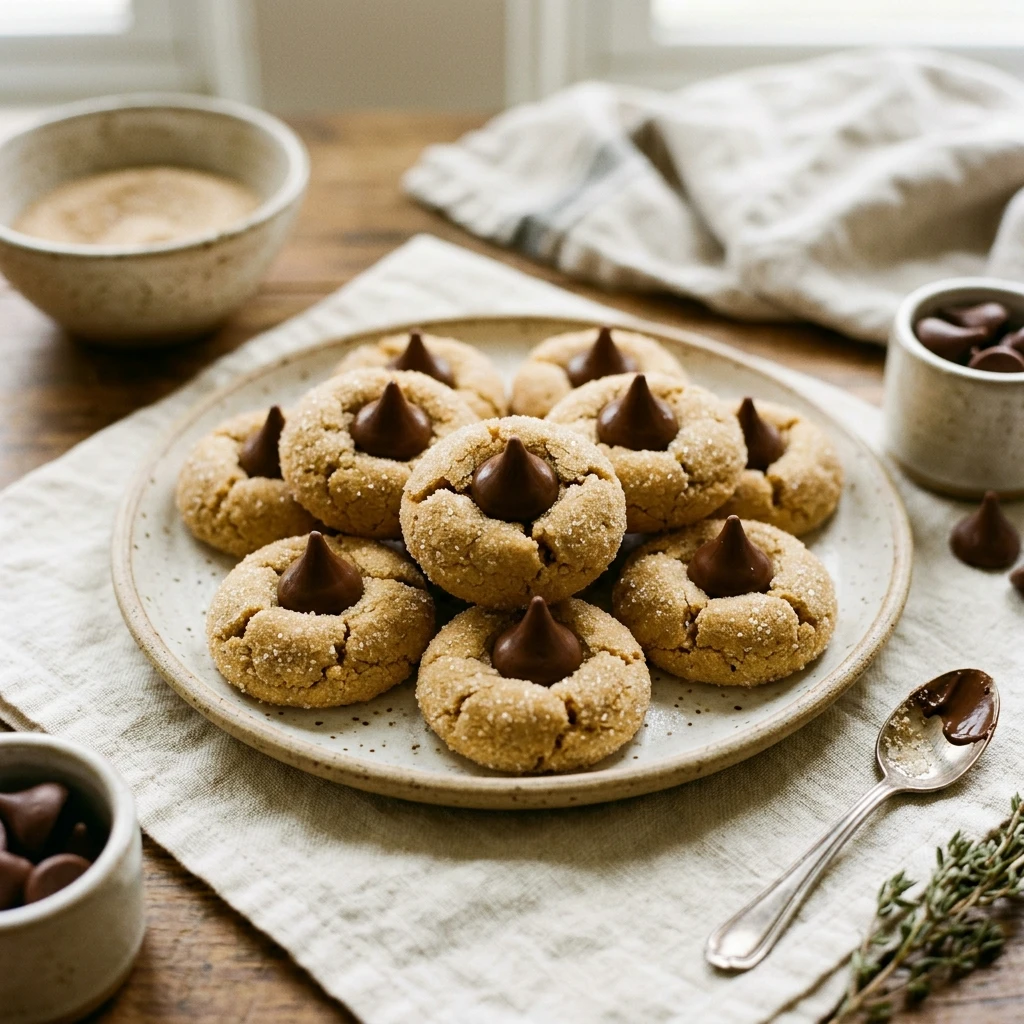
Nothing says “holiday classic” quite like a warm tray of Peanut Butter Blossoms with Hershey Kisses. These iconic cookies offer the perfect marriage of salty peanut butter and smooth milk chocolate. Whether you are prepping for a cookie swap or just want a nostalgic treat to enjoy with a glass of milk, this recipe delivers that soft, chewy texture you crave. The signature crackle on the sides and the melty chocolate center make them a showstopper every single time. Let’s get baking!
Recipe Information
- Prep Time: 15 minutes
- Cook Time: 10 minutes
- Total Time: 25 minutes
- Servings: 24 cookies
- Difficulty: Easy
Nutrition values
- Calories: 95 kcal
- Protein: 2g
- Carbs: 12g
Why Make This Peanut Butter Blossoms with Hershey Kisses
You should make these cookies because they are a timeless crowd-pleaser that requires very little effort. The ingredients are likely already in your pantry, making it a great last-minute dessert option. Kids love helping unwrap the chocolates and pressing them into the soft dough, making it a fun family activity. Plus, they stay soft for days, ensuring you have a delicious snack ready whenever a sugar craving hits.
Ingredients
- 1/2 cup granulated sugar (plus extra for rolling)
- 1/2 cup packed brown sugar
- 1/2 cup creamy peanut butter
- 1/2 cup softened unsalted butter
- 1 large egg
- 1 teaspoon vanilla extract
- 1 1/2 cups all-purpose flour
- 3/4 teaspoon baking soda
- 1/2 teaspoon salt
- 24 Hershey’s Kisses (unwrapped)
Directions
Step 1: Prep the Oven and Chocolates
Preheat your oven to 375°F (190°C). While the oven heats up, unwrap all 24 Hershey’s Kisses and set them aside in a small bowl. Having them ready is crucial because you must press them into the cookies the moment they come out of the oven.
Step 2: Cream the Butter and Sugars
In a large mixing bowl, beat the softened butter, creamy peanut butter, granulated sugar, and brown sugar together. Use an electric mixer on medium speed until the mixture looks light and fluffy. This usually takes about 2 to 3 minutes.
Step 3: Incorporate Wet Ingredients
Add the egg and the vanilla extract to the creamed mixture. Beat again until everything is fully combined. Scrape down the sides of the bowl with a spatula to ensure no ingredients are left behind.
Step 4: Mix in Dry Ingredients
In a separate small bowl, whisk together the flour, baking soda, and salt. Gradually add this dry mixture to the wet ingredients while mixing on low speed. Mix just until the flour disappears; over-mixing can lead to tough cookies.
Step 5: Shape and Roll the Dough
Shape the dough into 1-inch balls. Roll each ball in a small bowl of granulated sugar until evenly coated. Place the balls about 2 inches apart on an ungreased baking sheet or a sheet lined with parchment paper.
Step 6: Bake the Cookies
Place the baking sheet in the oven and bake for 8 to 10 minutes. Watch for the edges to turn a very light golden brown. The cookies should look slightly puffed and have small cracks on the surface.
Step 7: Press the Kisses
Immediately after removing the cookies from the oven, press a Hershey’s Kiss firmly into the center of each cookie. The cookie will crack slightly around the edges—this is the classic “blossom” look. The heat from the cookie will soften the chocolate, helping it stick.
Step 8: Cool and Set
Transfer the cookies to a wire rack to cool completely. The chocolate will stay soft for a while, so let them sit undisturbed until the Kisses have re-hardened before stacking or storing them.
Expert Tips for Perfect Peanut Butter Blossoms with Hershey Kisses
To get the best results, use standard creamy peanut butter rather than natural varieties that require stirring. Natural peanut butter often contains too much oil, which can cause the cookies to spread too thin. If your kitchen is very warm and the dough feels sticky, chill it in the refrigerator for 30 minutes before rolling. Finally, don’t overbake! The cookies might look slightly underdone when you pull them out, but they will firm up as they cool.
Delicious Variations
While the classic version is hard to beat, you can easily customize these treats. Try rolling the dough balls in colored sanding sugar (red or green for Christmas) instead of plain white sugar. Swap the milk chocolate Kisses for Dark Chocolate, Hugs (striped), or even Peanut Butter-filled Kisses for an extra punch of flavor. If you aren’t a fan of Kisses, you can press a miniature peanut butter cup into the center instead.
Frequently Asked Questions
How do I store Peanut Butter Blossoms?
Store your cookies in an airtight container at room temperature for up to 5 days. If you need to stack them, wait until the chocolate is completely firm so they don’t smear.
Can I freeze the dough?
Yes! You can freeze the rolled dough balls (without the sugar coating) for up to 3 months. When you are ready to bake, thaw them in the fridge, roll in sugar, and bake as directed.
Why did my Hershey Kisses melt into a puddle?
If the chocolate loses its shape entirely, the cookies might have been too hot or your kitchen is too warm. To help the Kisses maintain their shape, you can pop the unwrapped chocolates in the freezer for 15 minutes before pressing them into the hot cookies.
Can I use crunchy peanut butter?
Absolutely. If you prefer a bit of texture in your cookie base, crunchy peanut butter works perfectly fine in this recipe. Just ensure it is a standard commercial brand.
How do I keep the cookies soft?
Adding a slice of white bread to your storage container is a classic trick. The cookies will absorb the moisture from the bread, keeping them soft and chewy for a longer period.
Conclusion
Peanut Butter Blossoms with Hershey Kisses are more than just a recipe; they are a tradition. With their soft peanut butter base and iconic chocolate peak, they bring joy to any dessert table. Now that you know the secrets to the perfect bake, grab your apron and start rolling. Your friends and family will thank you!


Peanut Butter Blossoms with Hershey Kisses
- Total Time: 25 minutes
- Diet: Vegetarian
Ingredients
- 1/2 cup granulated sugar (plus extra for rolling)
- 1/2 cup packed brown sugar
- 1/2 cup creamy peanut butter
- 1/2 cup softened unsalted butter
- 1 large egg
- 1 teaspoon vanilla extract
- 1 1/2 cups all-purpose flour
- 3/4 teaspoon baking soda
- 1/2 teaspoon salt
- 24 Hershey’s Kisses (unwrapped)
Instructions
- Preheat your oven to 375°F (190°C). While the oven heats up, unwrap all 24 Hershey’s Kisses and set them aside in a small bowl. Having them ready is crucial because you must press them into the cookies the moment they come out of the oven.
- In a large mixing bowl, beat the softened butter, creamy peanut butter, granulated sugar, and brown sugar together. Use an electric mixer on medium speed until the mixture looks light and fluffy. This usually takes about 2 to 3 minutes.
- Add the egg and the vanilla extract to the creamed mixture. Beat again until everything is fully combined. Scrape down the sides of the bowl with a spatula to ensure no ingredients are left behind.
- In a separate small bowl, whisk together the flour, baking soda, and salt. Gradually add this dry mixture to the wet ingredients while mixing on low speed. Mix just until the flour disappears; over-mixing can lead to tough cookies.
- Shape the dough into 1-inch balls. Roll each ball in a small bowl of granulated sugar until evenly coated. Place the balls about 2 inches apart on an ungreased baking sheet or a sheet lined with parchment paper.
- Place the baking sheet in the oven and bake for 8 to 10 minutes. Watch for the edges to turn a very light golden brown. The cookies should look slightly puffed and have small cracks on the surface.
- Immediately after removing the cookies from the oven, press a Hershey’s Kiss firmly into the center of each cookie. The cookie will crack slightly around the edges—this is the classic “blossom” look. The heat from the cookie will soften the chocolate, helping it stick.
- Transfer the cookies to a wire rack to cool completely. The chocolate will stay soft for a while, so let them sit undisturbed until the Kisses have re-hardened before stacking or storing them.
- Cook Time: 25 minutes