Recipe Information
- Prep Time: 20 minutes
- Cook Time: 0 minutes
- Total Time: 20 minutes
- Servings: 6 servings
- Difficulty: Easy
Nutrition values
- Calories: 345 kcal
- Protein: 4g
- Carbs: 58g
Why Make This Pumpkin Patch Dirt Cups Recipe
There are so many reasons to love this recipe. First, it is a “no-bake” dessert, which is a lifesaver when your oven is already busy with autumn roasts or pies. Second, it is incredibly kid-friendly; children love helping to crush the cookies and “plant” the pumpkins. Third, the portion control of individual cups makes serving at parties a breeze. Finally, the combination of textures—the crunchy cookie “dirt” against the silky smooth pudding—creates a satisfying bite every single time. It is a whimsical, budget-friendly way to celebrate the harvest season without any complicated techniques.Ingredients
- 1 package (3.9 oz) Instant Chocolate Pudding Mix
- 2 cups cold whole milk
- 1 tub (8 oz) whipped topping, thawed (like Cool Whip)
- 1 package (14.3 oz) Chocolate Sandwich Cookies (Oreos)
- 1 bag Mellowcreme Pumpkin candies
- Green decorating gel or green frosting
- Optional: Mint leaves for extra “foliage”
Directions
Step 1: Prepare the Cookie Dirt
Place the chocolate sandwich cookies into a large gallon-sized freezer bag. Use a rolling pin or a heavy spoon to crush them until they resemble dark soil. You want a mix of fine crumbs and some slightly larger chunks to give the “dirt” a realistic texture. Set the crumbs aside in a bowl.Step 2: Mix the Pudding Base
In a large mixing bowl, whisk together the instant chocolate pudding mix and the cold milk. Continue whisking for about two minutes until the mixture begins to thicken. Let it sit for five minutes to firm up completely.Step 3: Create the Fluffy Texture
Gently fold the thawed whipped topping into the chocolate pudding using a rubber spatula. Mix until no white streaks remain. This creates a “mousse-like” consistency that is lighter and airier than standard pudding, making the dessert feel more special.Step 4: Layer the Cups
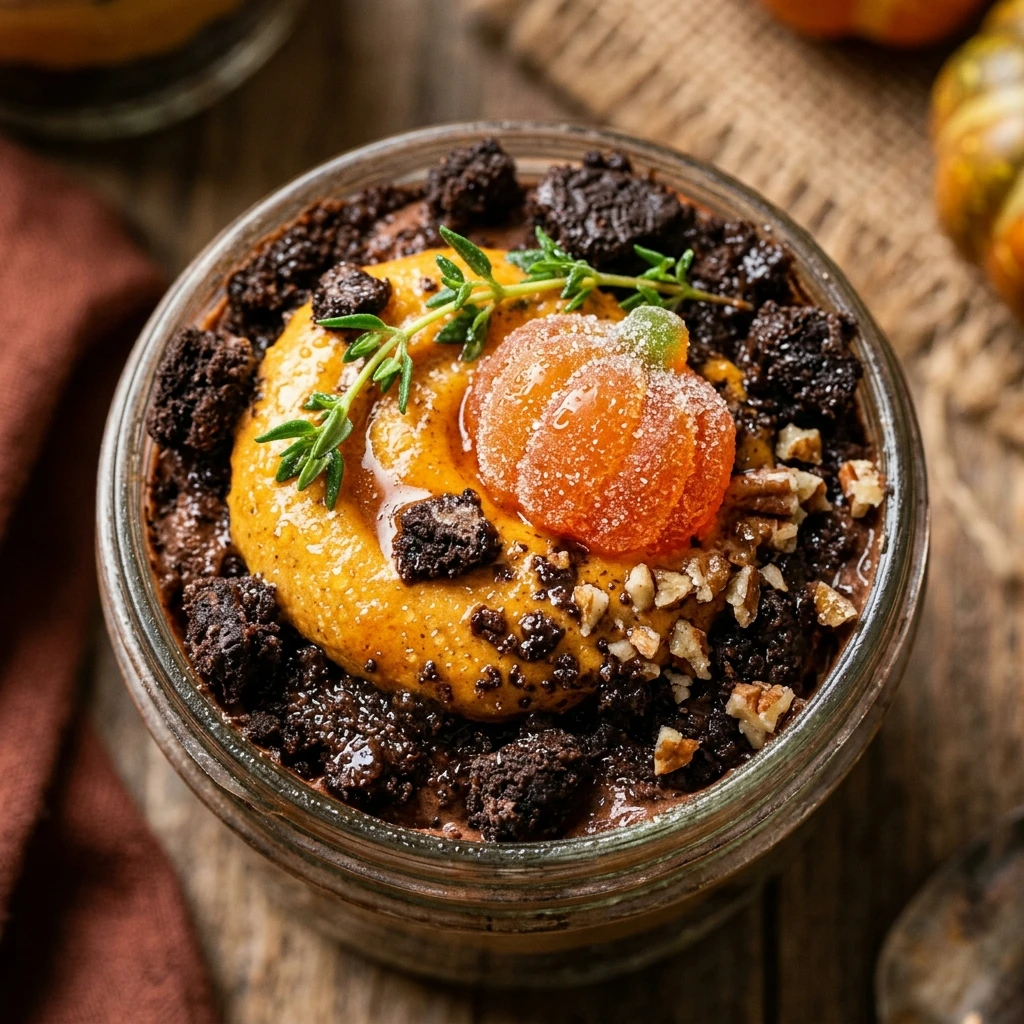
Gather six clear plastic cups or small glass jars. Start by placing a tablespoon of cookie crumbs at the bottom of each cup. Spoon a layer of the pudding mixture over the crumbs. Repeat the layers, ending with a thick layer of cookie crumbs on top to act as the surface of your pumpkin patch.Step 5: Plant the Pumpkin Patch
Place two or three Mellowcreme pumpkins on top of the cookie crumbs in each cup. Use the green decorating gel or frosting to draw small “vines” and “tendrils” connecting the pumpkins. If you want a more natural look, tuck a small mint leaf next to a pumpkin to serve as a leaf.Step 6: Chill and Serve
Place the completed cups in the refrigerator for at least 30 minutes before serving. This allows the pudding to set and the flavors to meld. Serve cold and enjoy the smiles!Expert Tips for Perfect Pumpkin Patch Dirt Cups Recipe
- Use Cold Milk: For instant pudding to set correctly, your milk must be very cold. Take it out of the fridge only when you are ready to pour.
- Don’t Over-Crush: Avoid turning the cookies into a fine powder. A few larger chunks make the “dirt” look more authentic and provide a better crunch.
- Clear Vessels: Use clear cups so you can see the beautiful layers of “soil” and pudding from the side.
- Thaw the Topping: Ensure your whipped topping is fully thawed in the refrigerator before folding it in, or you will end up with lumps.
Delicious Variations
- Vanilla Patch: Use vanilla or butterscotch pudding tinted with orange food coloring for a different flavor profile.
- Hidden Treasures: Add a few gummy worms into the middle layers for a spooky “garden” surprise.
- Healthy Swap: Use Greek yogurt mixed with cocoa powder and honey instead of pudding for a protein-packed version.
- Boozy Batch: For an adult party, whisk a splash of Irish cream or coffee liqueur into the pudding mix.
Frequently Asked Questions
Can I make these dirt cups a day in advance?
Yes, you can make them up to 24 hours in advance. However, wait to add the cookie topping and the candy pumpkins until just before serving. If the cookies sit on the pudding for too long, they can lose their crunch and become soft.What is the best way to crush the cookies?
A food processor is the fastest way to get uniform crumbs. However, the bag-and-rolling-pin method is better if you want a rustic look with varying sizes of “dirt” particles.Can I use homemade whipped cream instead of whipped topping?
You certainly can! Just ensure you whip the cream to stiff peaks before folding it in. Note that homemade whipped cream is less stable than store-bought whipped topping, so the cups may need to be eaten sooner.How do I store leftovers?
Store any leftover dirt cups in the refrigerator, covered with plastic wrap. They will stay fresh for up to 3 days, though the cookie crumbs will soften over time.Can I use different types of cookies?
Absolutely. While chocolate Oreos provide the best “dirt” look, you can use chocolate wafers, graham crackers, or even chocolate cereal for different textures.Conclusion
Pumpkin Patch Dirt Cups are the perfect combination of festive fun and delicious simplicity. They require no special baking skills, making them a go-to recipe for busy parents and party hosts alike. With their rich chocolate layers and whimsical candy toppings, they capture the spirit of fall in every spoonful. Whip up a batch today and watch as both kids and adults dig into these charming treats!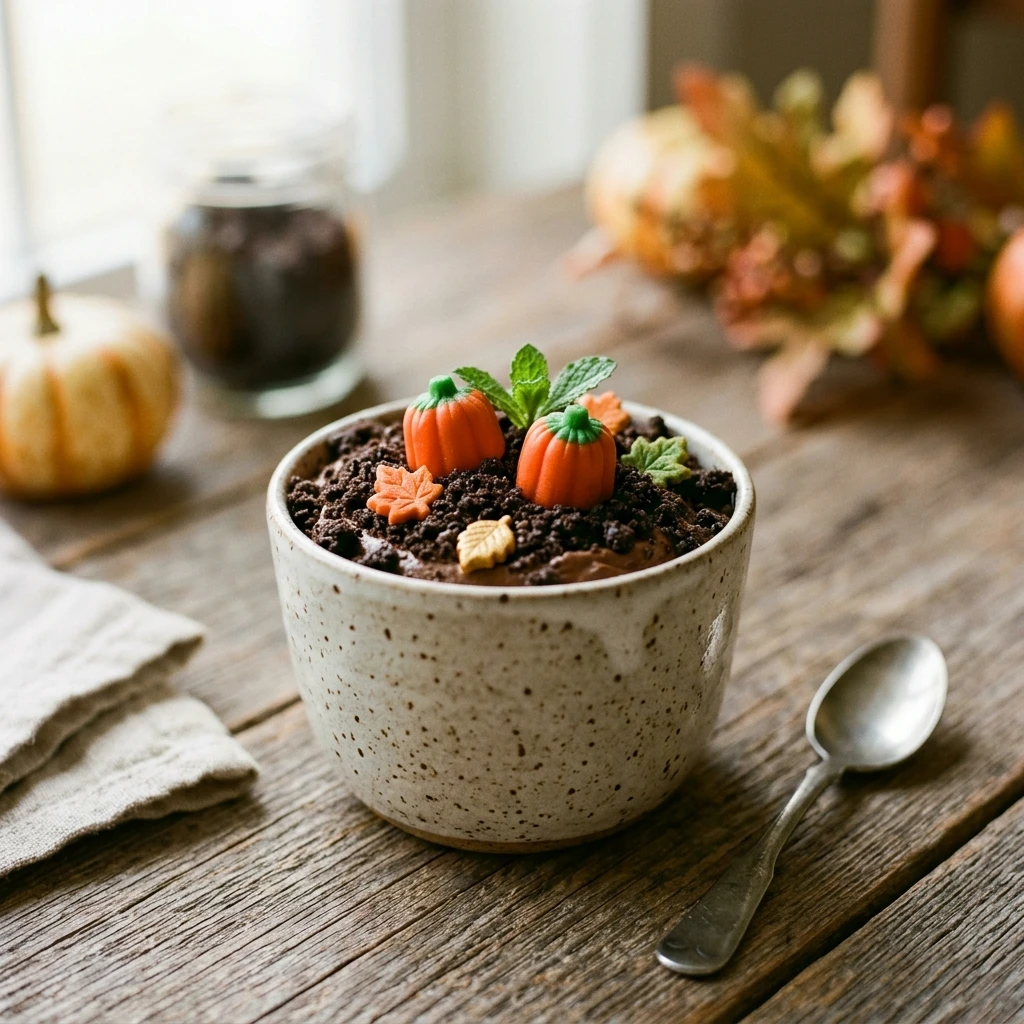


Pumpkin Patch Dirt Cups Recipe
- Total Time: 20 minutes
- Diet: Vegetarian
Ingredients
Scale
- 1 package (3.9 oz) Instant Chocolate Pudding Mix
- 2 cups cold whole milk
- 1 tub (8 oz) whipped topping, thawed (like Cool Whip)
- 1 package (14.3 oz) Chocolate Sandwich Cookies (Oreos)
- 1 bag Mellowcreme Pumpkin candies
- Green decorating gel or green frosting
- Optional: Mint leaves for extra “foliage”
Instructions
- Step 1: Prepare the Cookie Dirt
Place the chocolate sandwich cookies into a large gallon-sized freezer bag. Use a rolling pin or a heavy spoon to crush them until they resemble dark soil. You want a mix of fine crumbs and some slightly larger chunks to give the “dirt” a realistic texture. Set the crumbs aside in a bowl. - Step 2: Mix the Pudding Base
In a large mixing bowl, whisk together the instant chocolate pudding mix and the cold milk. Continue whisking for about two minutes until the mixture begins to thicken. Let it sit for five minutes to firm up completely. - Step 3: Create the Fluffy Texture
Gently fold the thawed whipped topping into the chocolate pudding using a rubber spatula. Mix until no white streaks remain. This creates a “mousse-like” consistency that is lighter and airier than standard pudding, making the dessert feel more special. - Step 4: Layer the Cups
Gather six clear plastic cups or small glass jars. Start by placing a tablespoon of cookie crumbs at the bottom of each cup. Spoon a layer of the pudding mixture over the crumbs. Repeat the layers, ending with a thick layer of cookie crumbs on top to act as the surface of your pumpkin patch. - Step 5: Plant the Pumpkin Patch
Place two or three Mellowcreme pumpkins on top of the cookie crumbs in each cup. Use the green decorating gel or frosting to draw small “vines” and “tendrils” connecting the pumpkins. If you want a more natural look, tuck a small mint leaf next to a pumpkin to serve as a leaf. - Step 6: Chill and Serve
Place the completed cups in the refrigerator for at least 30 minutes before serving. This allows the pudding to set and the flavors to meld. Serve cold and enjoy the smiles!
- Cook Time: 20 minutes